With the Lucid Meetings Outlook Add-in, you can schedule and update meetings in Lucid directly from your Microsoft Outlook calendar.
You must have Room Manager access in at least one Lucid meeting room to use this feature.
About this Integration
When you use the Lucid Meetings Outlook add-in, you can schedule Lucid Meetings from the task pane in your Outlook calendar. These fields from Outlook are used for the meeting in Lucid:
- Meeting name
- Attendees (based on email address)
- Attendee RSVPs
- Date and time
- Repeat settings*
- Microsoft Teams URL, if you are using Teams for web conferencing.
You select the Lucid room and meeting template to use within the task pane of the add-in.
* If you see a message like "This add-in offers additional features for newer versions of Outlook" in the add-in, you are using an older version of Outlook that does not supply recurrence information to the add-in.
Once you've created a Lucid meeting using the add-in, our Outlook integration will automatically set up synchronization between Lucid and Outlook for that meeting. Synchronization will be supported only for meetings in organizations with paid subscriptions.
- Changes made in Outlook will automatically be made to the Lucid meeting, after a brief delay. (You will still have the option of explicitly updating a meeting by clicking "Update Lucid Meeting" in the add-in.)
- Changes made in Lucid will automatically update your Outlook event, causing Outlook to email updates to attendees.
To Install the Outlook Add-in:
This add-in is available from Microsoft's AppSource. Select the "Get Add-ins" icon in Outlook, then search for Lucid Meetings to find the Lucid Meetings for Outlook add-in.
To Schedule a Lucid Meeting from Outlook:
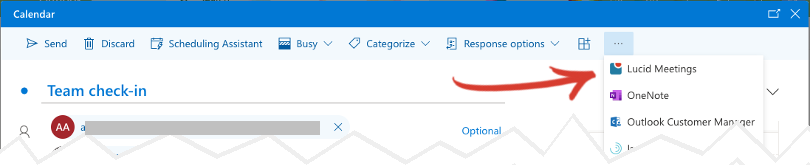
- Open the add-in:
The first time you use the add-in, you will be prompted to authorize it to use your Lucid account.
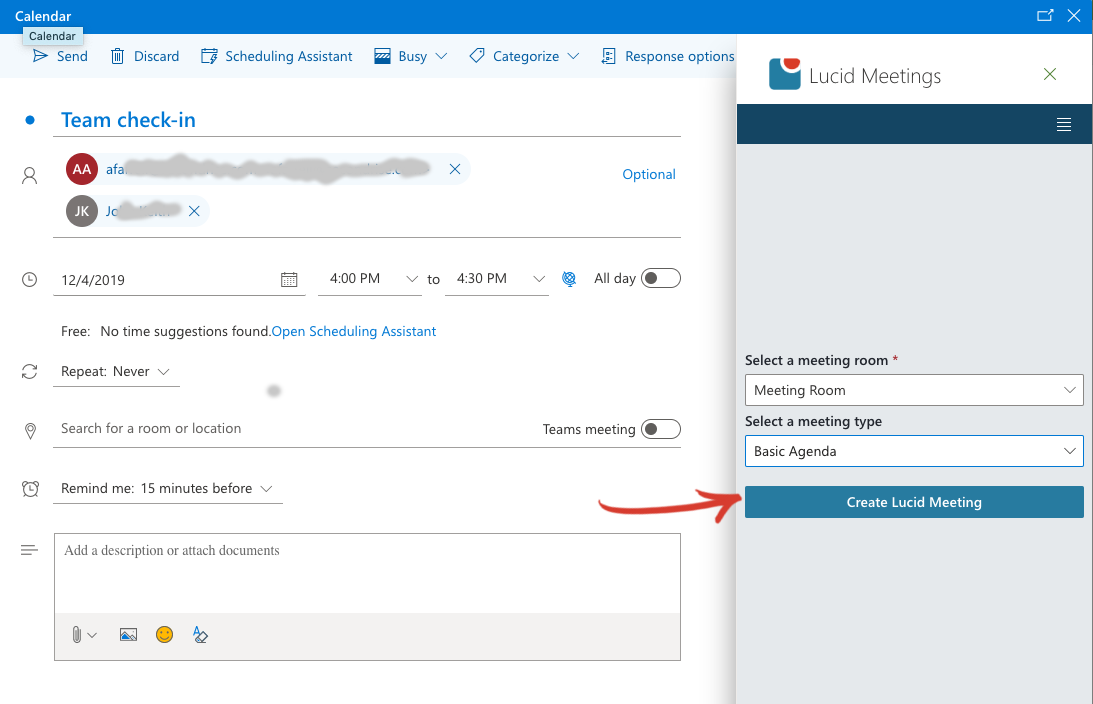
When you authorize the add-in, you will also be prompted to authorize Lucid Meetings to access your Outlook calendar. (It may be necessary for an administrator to approve this for your Microsoft 365 or Exchange installation.) - Select the Room and Meeting Template you want to use, then click Create Lucid Meeting:
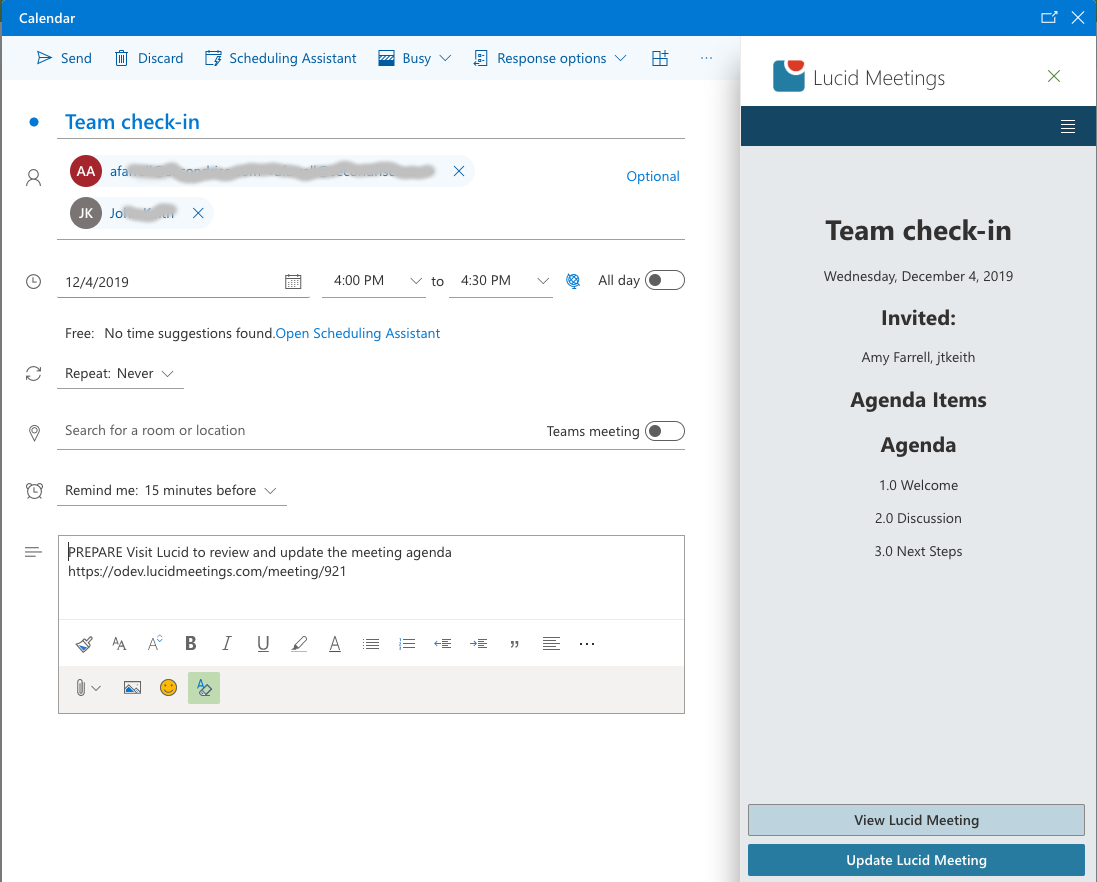
- A summary of the Lucid meeting will appear in the task pane, and details about joining the meeting are added to the description of the event in Outlook:
- Synchronization will start automatically (for organizations with paid subscriptions), after a brief delay. (Expect this to take at least a minute, and possibly several minutes.)
To Force an Update to a Lucid Meeting from Your Outlook Calendar:
If Lucid seems to have gotten out of step with your Outlook meeting, you can use the add-in to force an update. Open the add-in and click Update Lucid Meeting to update the Lucid meeting from your Outlook event.
