The fastest way to add a lot of people at once is to upload a file containing their contact information.
To upload new people to a meeting room:
Go to the meeting room in Lucid.
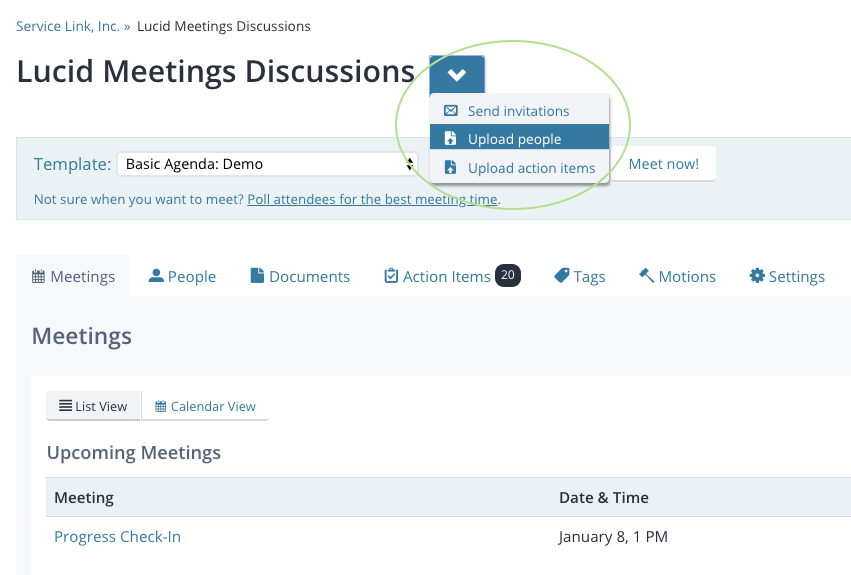
Click down arrow next to the meeting room name, and select Upload People.
Select the file including contact information and click Review Changes.
The upload accepts Excel and CSV files.
If your file doesn't contain a "Role" column, or if we find roles in that column that don't match Lucid roles, you'll be asked to select the role you want assigned to newly added people. You can always change an individual person's role later. After selecting roles, click Continue.
The upload asks you to map any roles we don't recognize to Lucid roles
Review the changes. If the list of people to be added or updated looks correct, scroll down. Select whether you want to send invitations now (see below for options) and click Apply Changes.
You'll now have all your people in your meeting room.
What to Put in the Upload File
Accepted Formats: Excel (XLXS) or CSV
Required Fields
Email address: You must supply a properly formatted email address for each person
Optional Fields If blank, Lucid will leave these fields blank for each person to fill in later.
First Name
Last Name
Company
Title
Role If you leave the Role field blank, Lucid will set each person's role to Member. The possible roles are:
Most people first log in to a Lucid site when they are invited to a meeting. Each meeting invitation link is personalized, and will prompt new members to create a password the first time they join a meeting.
For a group of new members added at once, consider sending a meeting invitation as your first invite. For them, this experience will be familiar - very much like what they have seen when invited to a GoTo Meeting or WebEX meeting in the past.
You can also invite new people to the meeting room directly.
To invite members to a meeting room:
Add new members using the upload, or by entering their email addresses using the Add People form.
At the bottom of the form, select "Yes, send an invitation". This will immediately send them an invitation to log in to the meeting room.
The default option is to send invitations when adding new room members
ALTERNATIVELY, you can choose to send meeting room invitations later, after you have everything set up the way you want it.
To send a meeting room invitation to a specific person:
Go to the meeting room and click the People tab
Click the Actions drop-down menu to the right of the person's name, and select "Send Invitation"
The Actions menu for a room member
You can send an individual as many invitations as you'd like. When you send invitations from the People tab or when adding people, the standard invitation text will go out immediately. It looks like this.
The invitation explains who sent it and provides links to log in.
You can also send invitations to all members at any time and include a personalized note.
To send meeting room invitations to all room members:
Go to the meeting room and click the Actions drop-down next to the meeting room name
Select Send invitations
The room Actions menu
Add a personal note, if desired, and click Send.
The personal note appears above the standard invitation text

 The upload asks you to map any roles we don't recognize to Lucid roles
 The default option is to send invitations when adding new room members
 The Actions menu for a room member
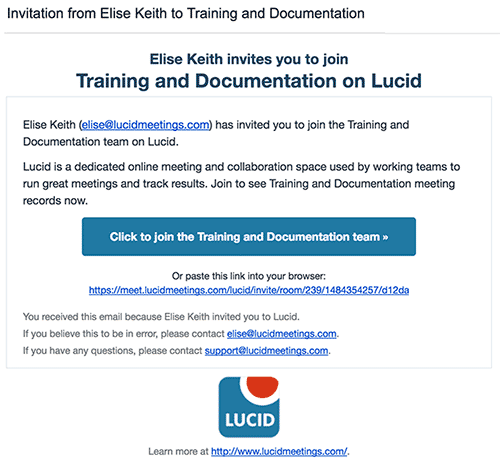
 The room Actions menu
  The personal note appears above the standard invitation text